
Installing a Japanese keyboard should feel like a tiny setup task. Somehow, for a lot of beginners, it turns into a dramatic side quest involving language settings, input methods, three suspicious menus, and the vague fear that maybe you were supposed to buy a Japanese laptop all along.
You were not.
What you actually need is a Japanese input method. In other words, you need your phone, tablet, or computer to stop acting like English is the only reasonable way to type and start giving you access to hiragana, katakana, kanji, and Japanese punctuation like a civilized device.
This guide walks you through exactly how to install Japanese keyboard input on iPhone, Android, Mac, and Windows—step by step. Then it shows you how to switch keyboards, how Japanese input actually works, and what to do right after installation so the setup turns into actual progress.
If your real goal is not just installation but actually using the keyboard for study, keep these nearby: MochiKana, Japanese Alphabet for Beginner, Japanese Writing System, and Learn Hiragana lessons.
Featured snippet version:
To install a Japanese keyboard, add Japanese as an input language or keyboard in your device settings, then switch to the Japanese input source and choose the input style you want. Navigate to Settings > General > Keyboard on your iPhone to add Japanese. Open Gboard Languages on Android to include the Japanese input. On Mac, add Japanese – Romaji via the Text Input menu. Finally, Windows users should add Japanese under Time & language to activate the Microsoft Japanese IME.
Good news:
You do not need a special Japanese computer or phone. A normal device plus the right input method is enough.
What a Japanese keyboard actually is

A Japanese keyboard is usually not special hardware. It is a software input method—often called an IME, or Input Method Editor—that lets you type Japanese with a regular device.
For most beginners, that means typing in romaji and letting the IME convert what you typed into hiragana, katakana, and kanji candidates. That is why a normal English keyboard works perfectly well at the start.
So before we get into each operating system, remember this: you are not installing a mysterious new machine. You are turning on a feature that was probably already waiting inside your device.
Before you start: which input mode should beginners use?

For almost all beginners, the best first choice is romaji input.
That means you type something like “nihongo,” the keyboard gives you にほんご, and then you can convert it into 日本語 if you want kanji. This is much easier than memorizing a kana keyboard layout on day one.
Use the easy door first:
Beginner study gets better when the setup reduces friction. There is no prize for choosing the harder input method too early.
How to install Japanese keyboard on iPhone or iPad
If you use an iPhone or iPad, the setup is fairly painless once you know where Apple hid the setting.
Follow these steps:
1. Open Settings.
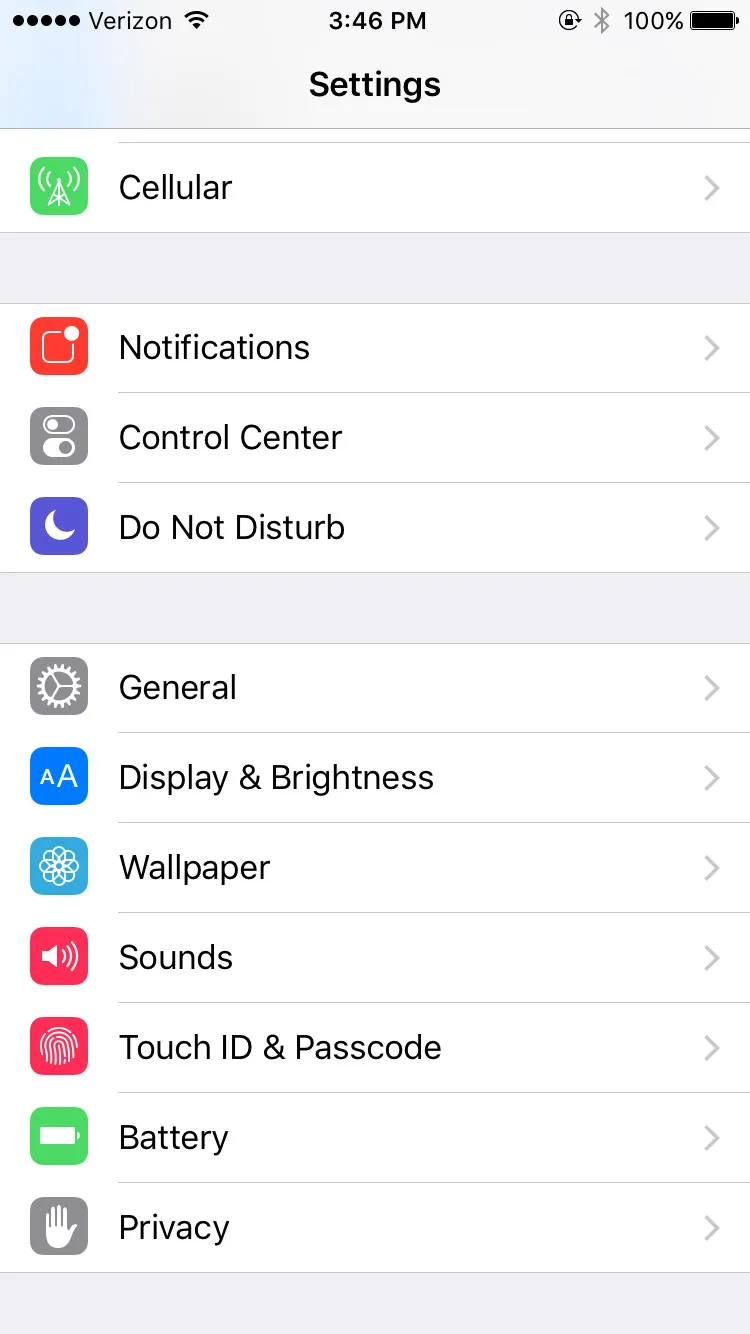
2. Tap General.
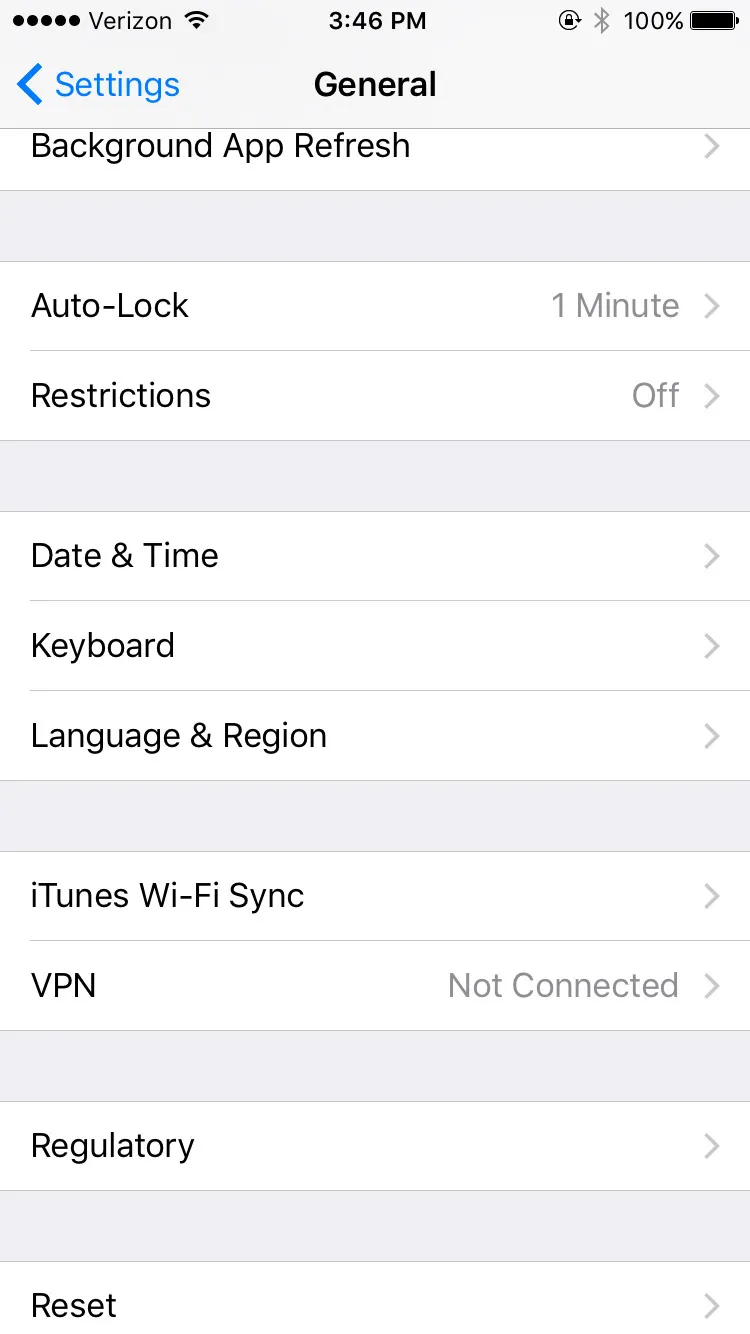
3. Tap Keyboard.
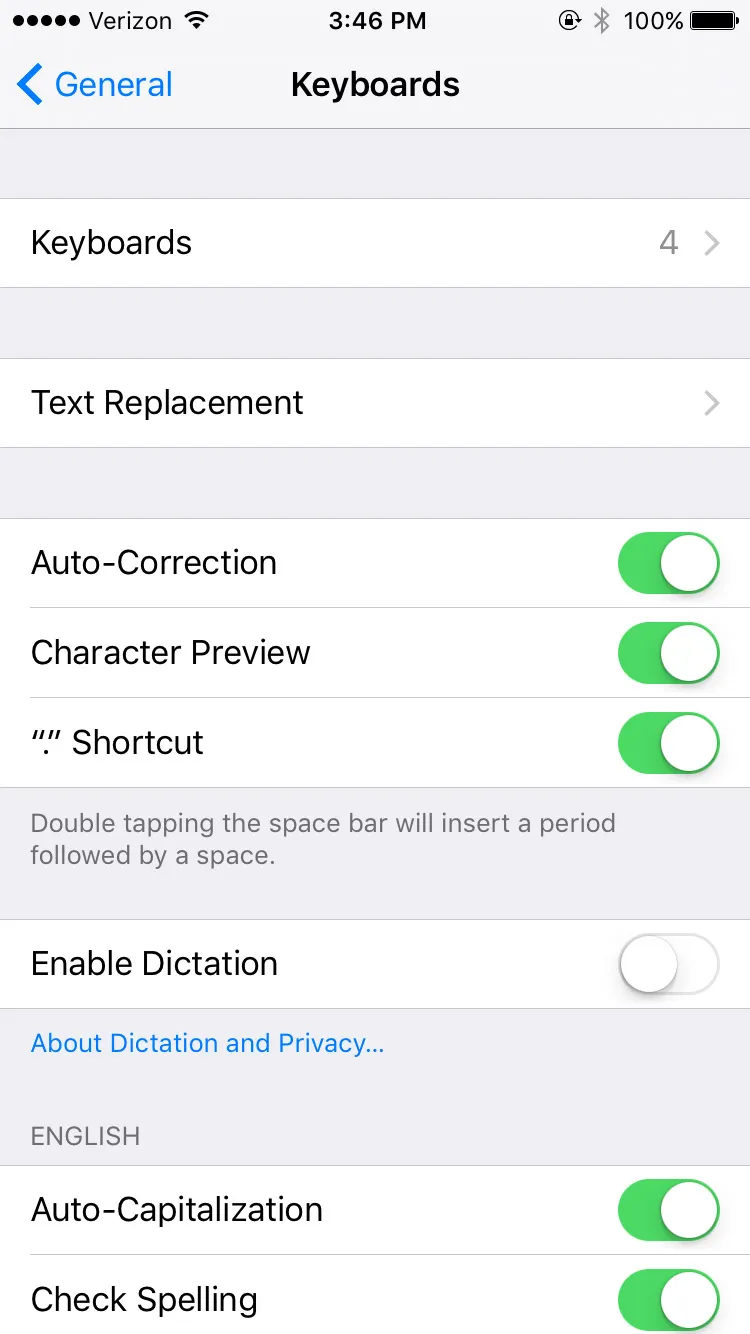
4. Tap Add New Keyboard.

5. Scroll to Japanese and select it.

6. Choose Romaji, Kana, or both.
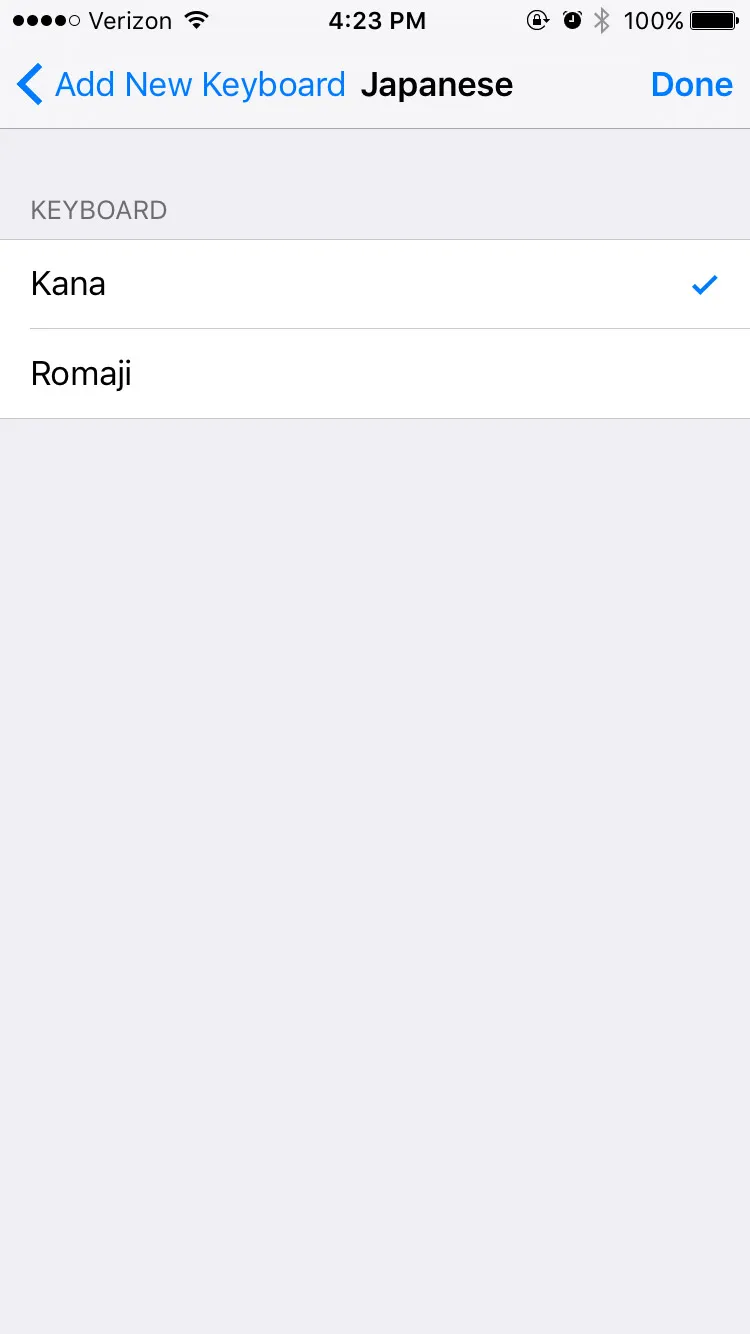
7. Tap Done.
Once the keyboard is installed, open any app with a text field. Tap the globe icon to switch keyboards until Japanese appears. If you enabled both Romaji and Kana, you may need to cycle through them.
For most beginners, Romaji is the right first pick. Kana input is real and useful, but it is a bigger adjustment.
Read: MochiKana – Learn Japanese Alphabet and Japanese Alphabet for Beginner. Once you can read kana more comfortably, the keyboard stops feeling like a fancy installation and starts feeling like a real tool.
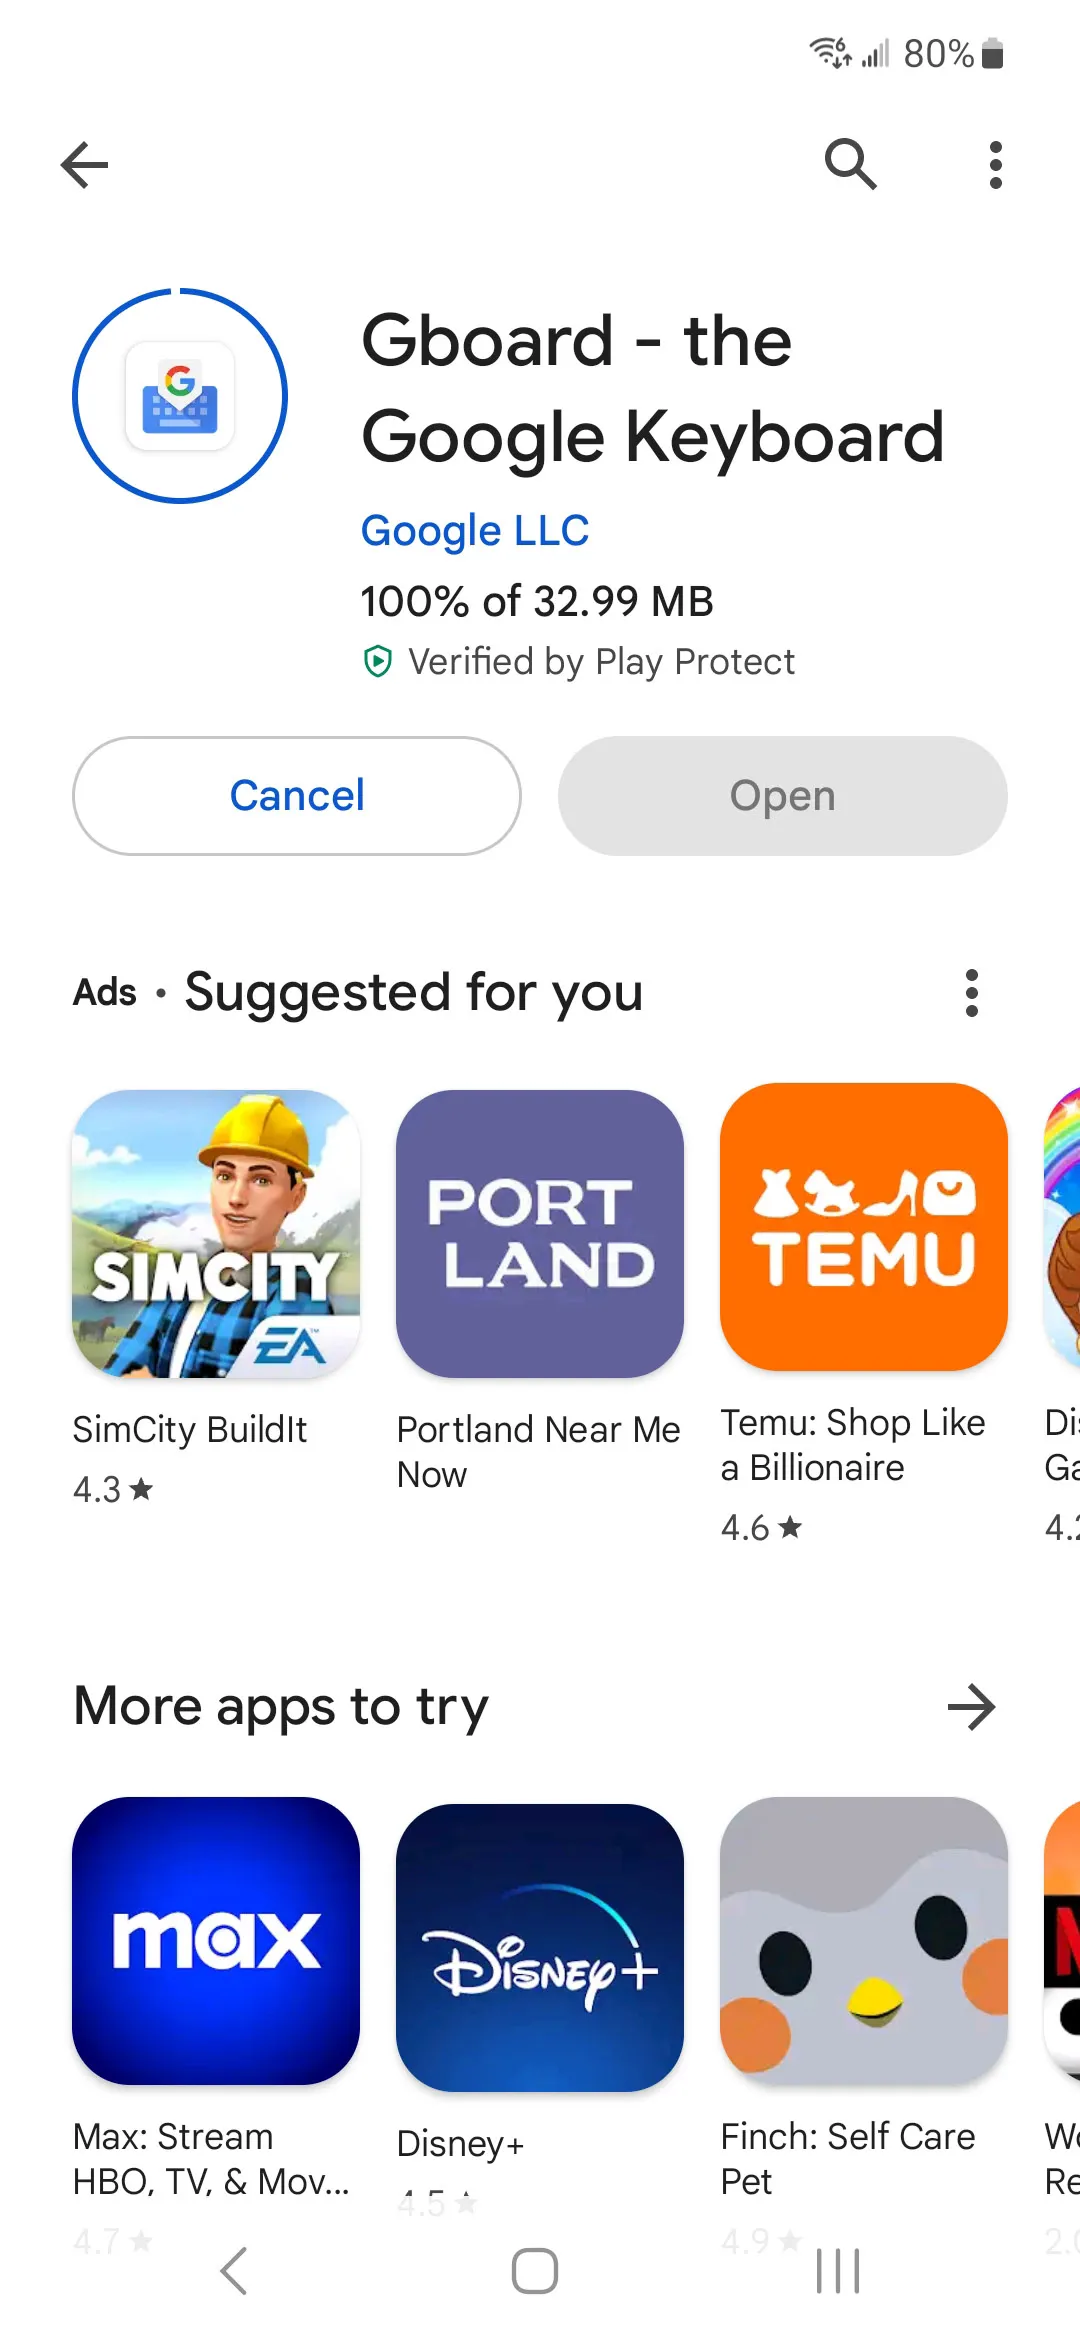
How to install Japanese keyboard on Android
Android is a little less uniform because different phones rearrange menus in slightly different ways. The easiest route for most learners is Gboard.
If you already use Gboard, great. If not, install it first, then follow these steps:
1. Download Gboard.
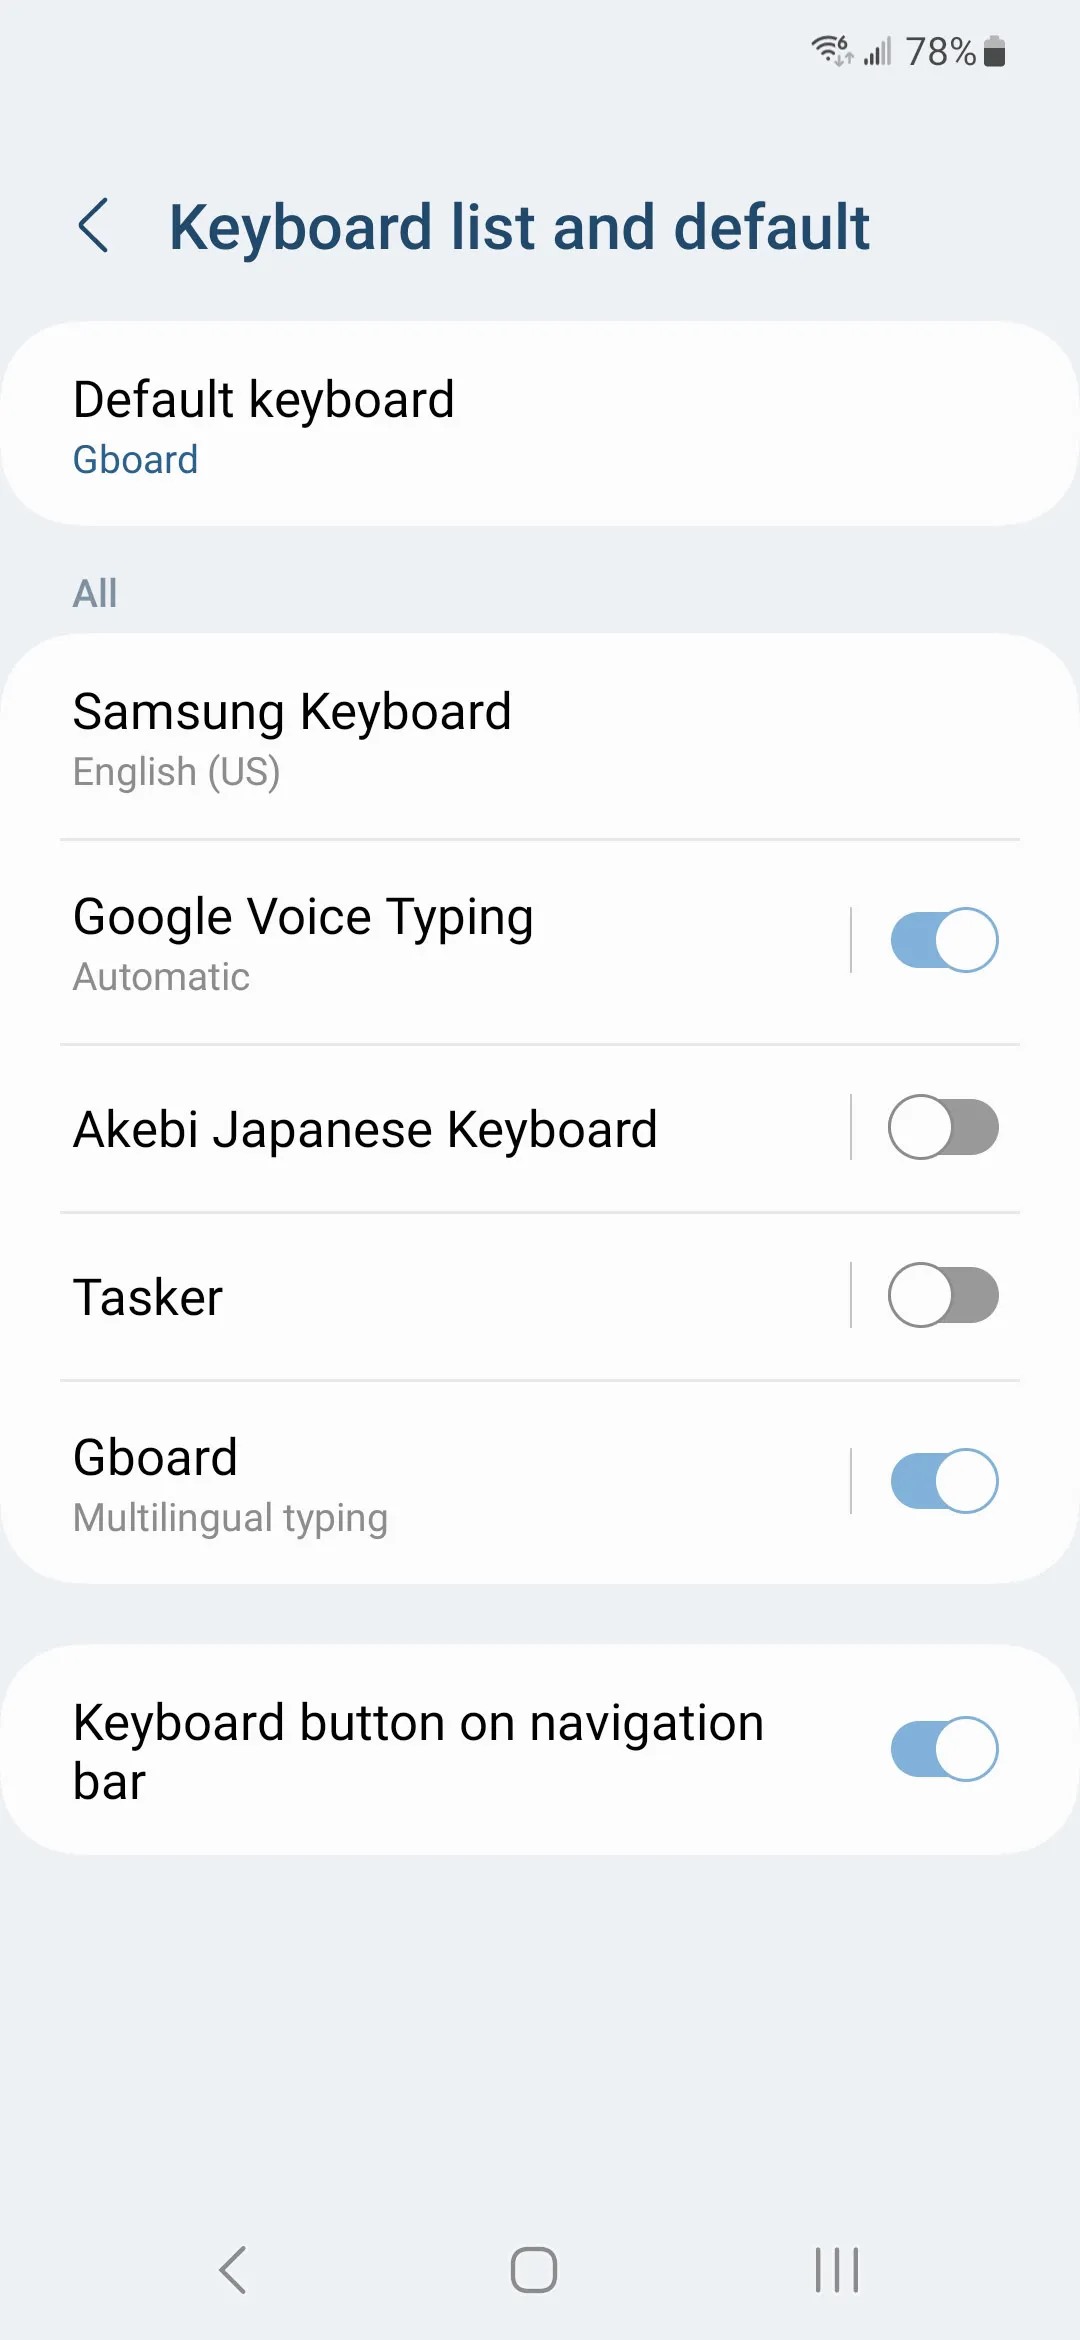
2. Go to the keyboard or on-screen keyboard section.
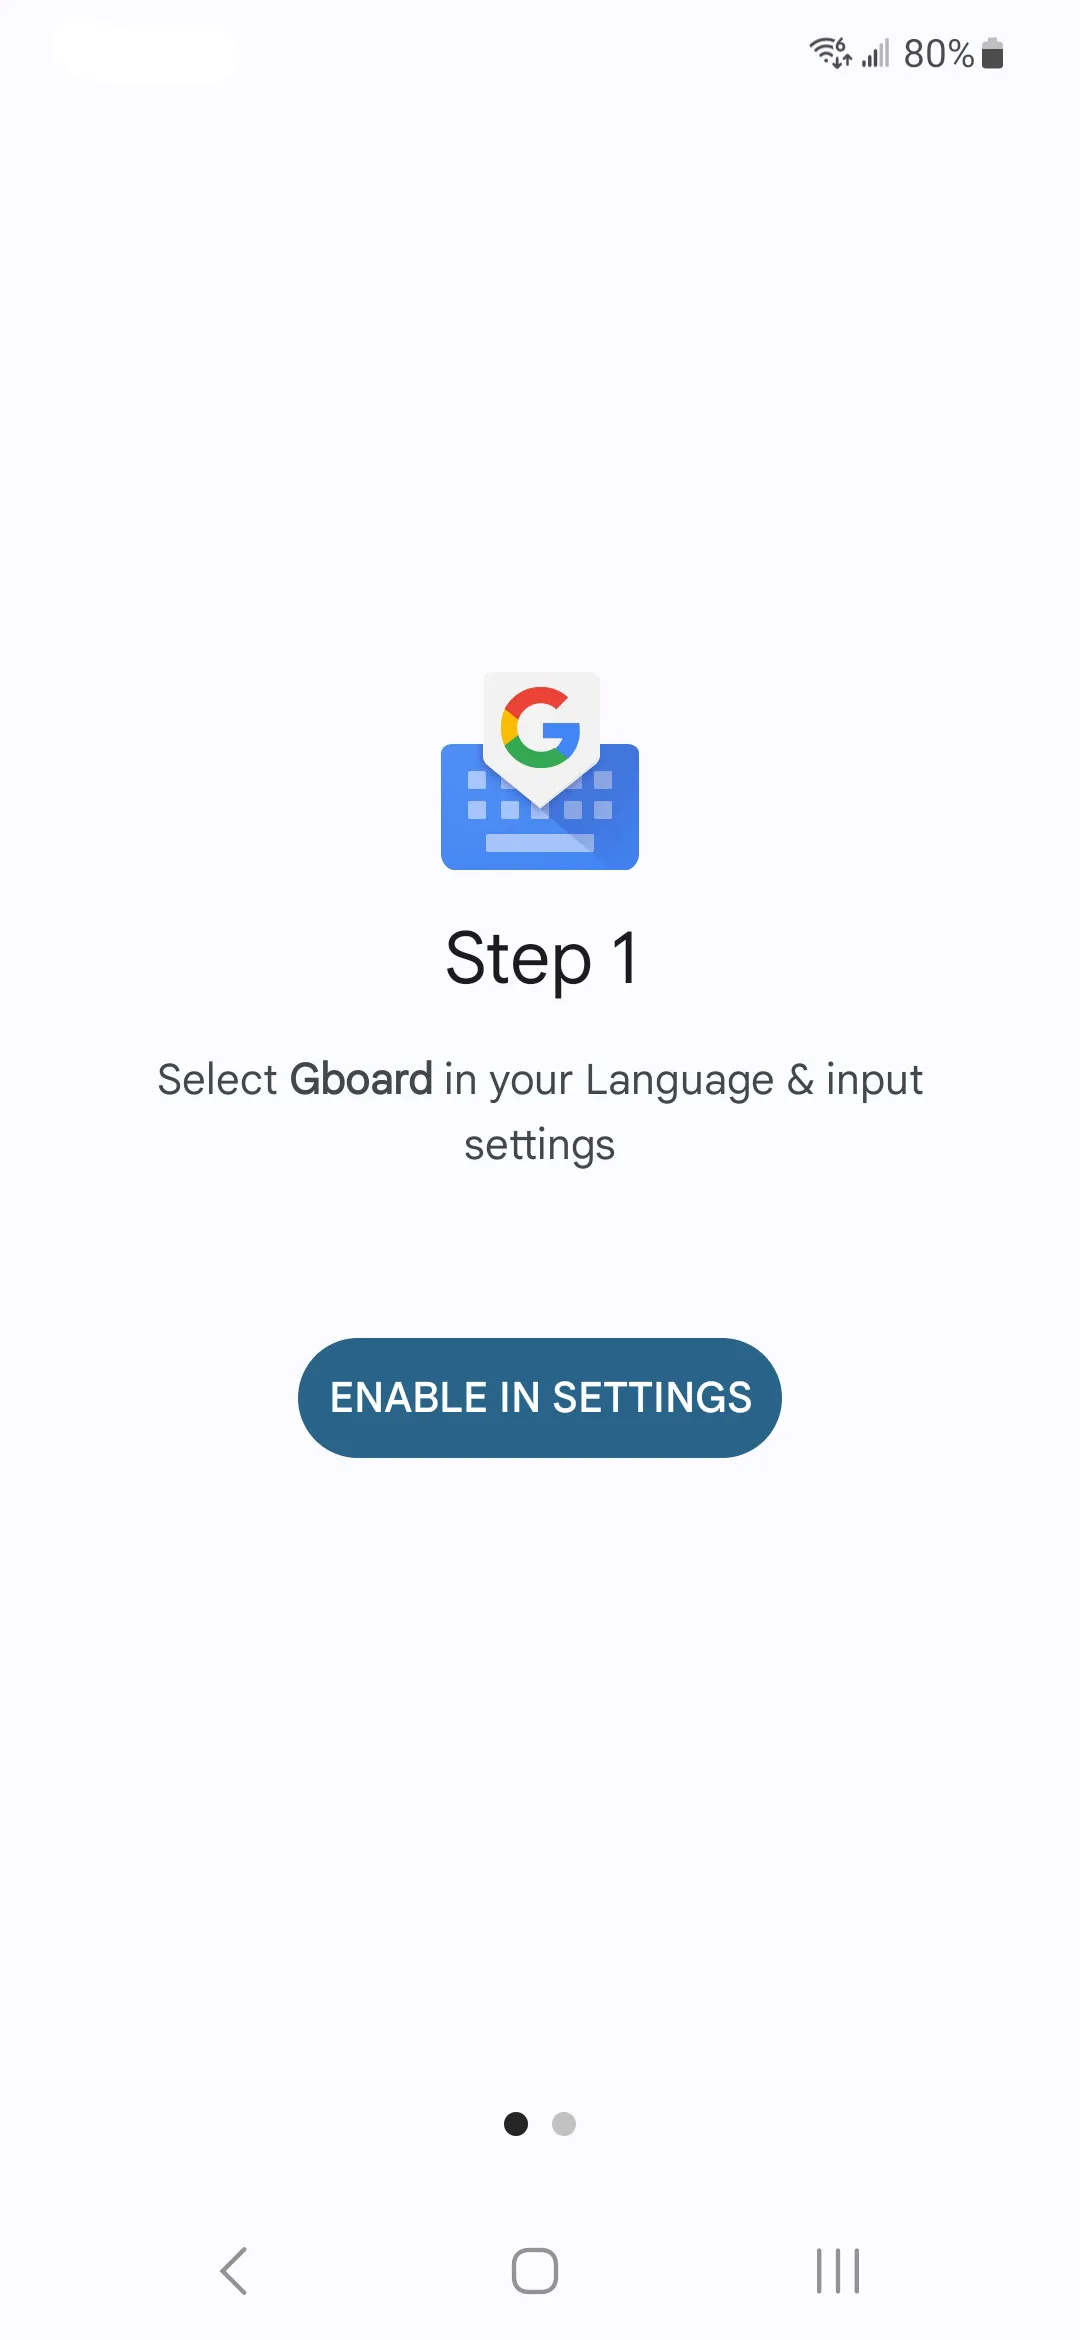
3. Open Gboard.
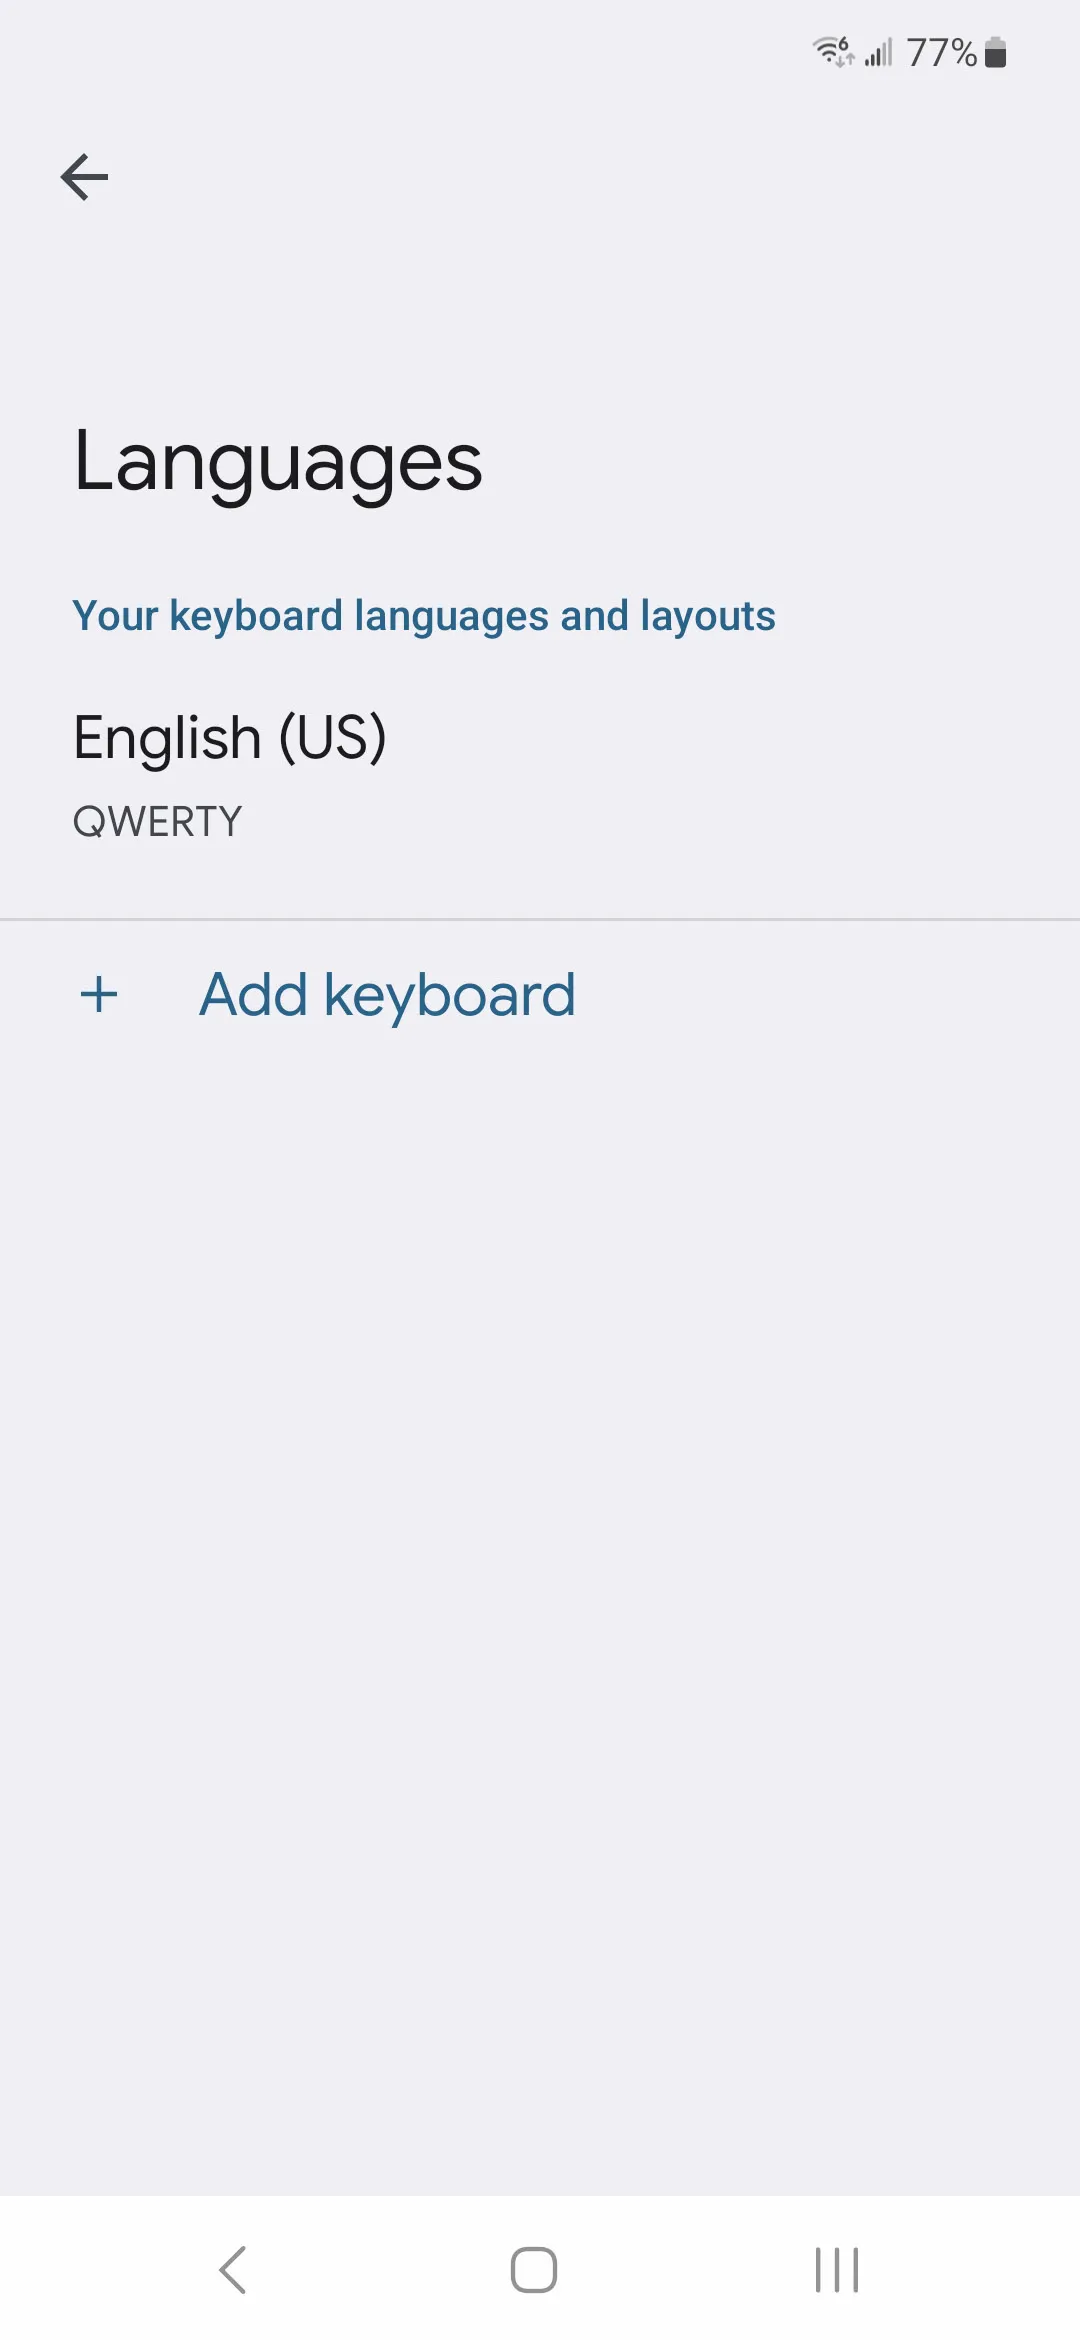
4. Tap Languages.
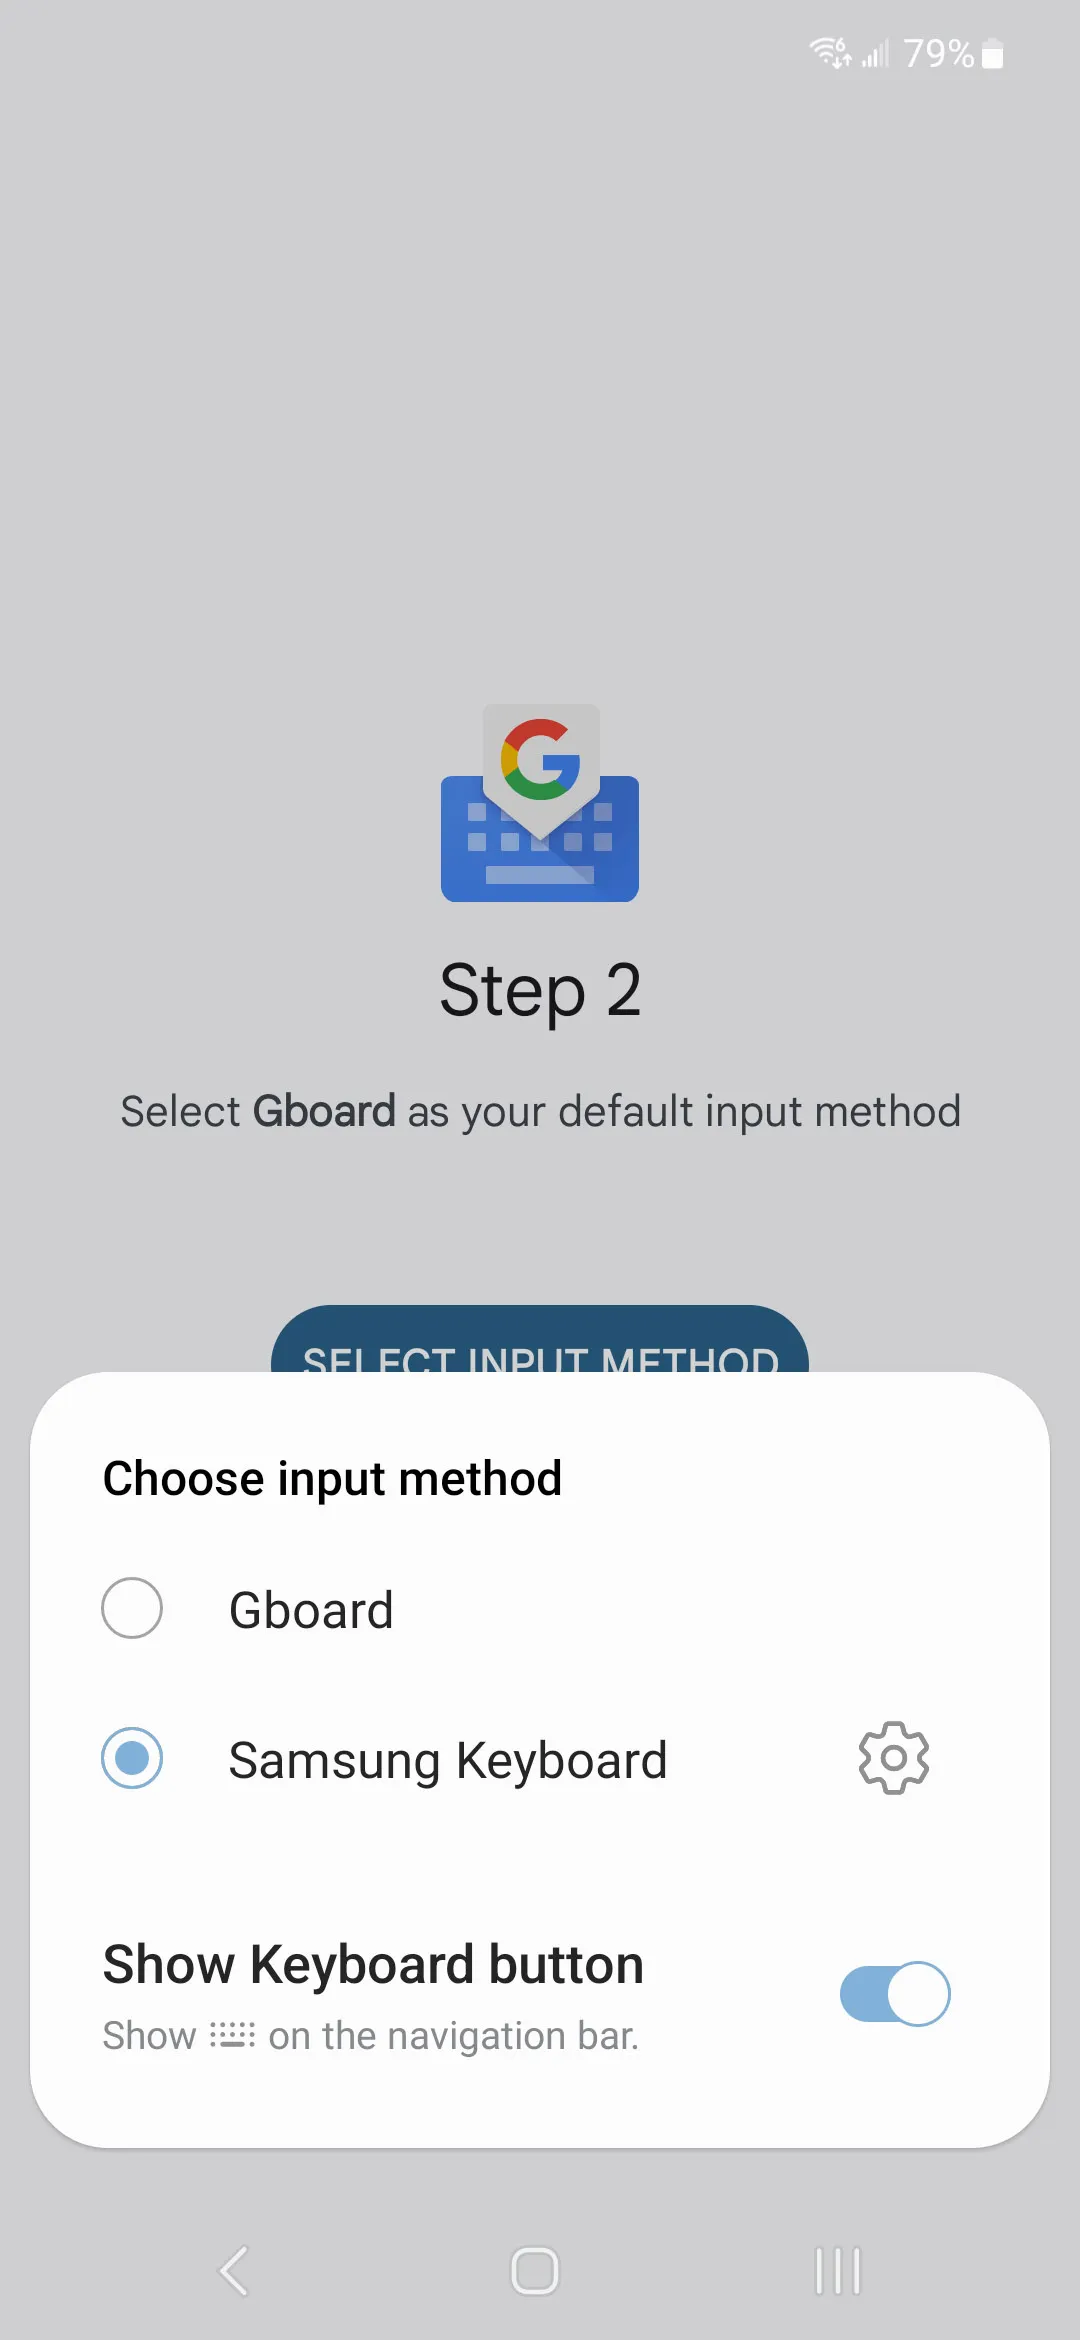
5. Tap Add Keyboard.
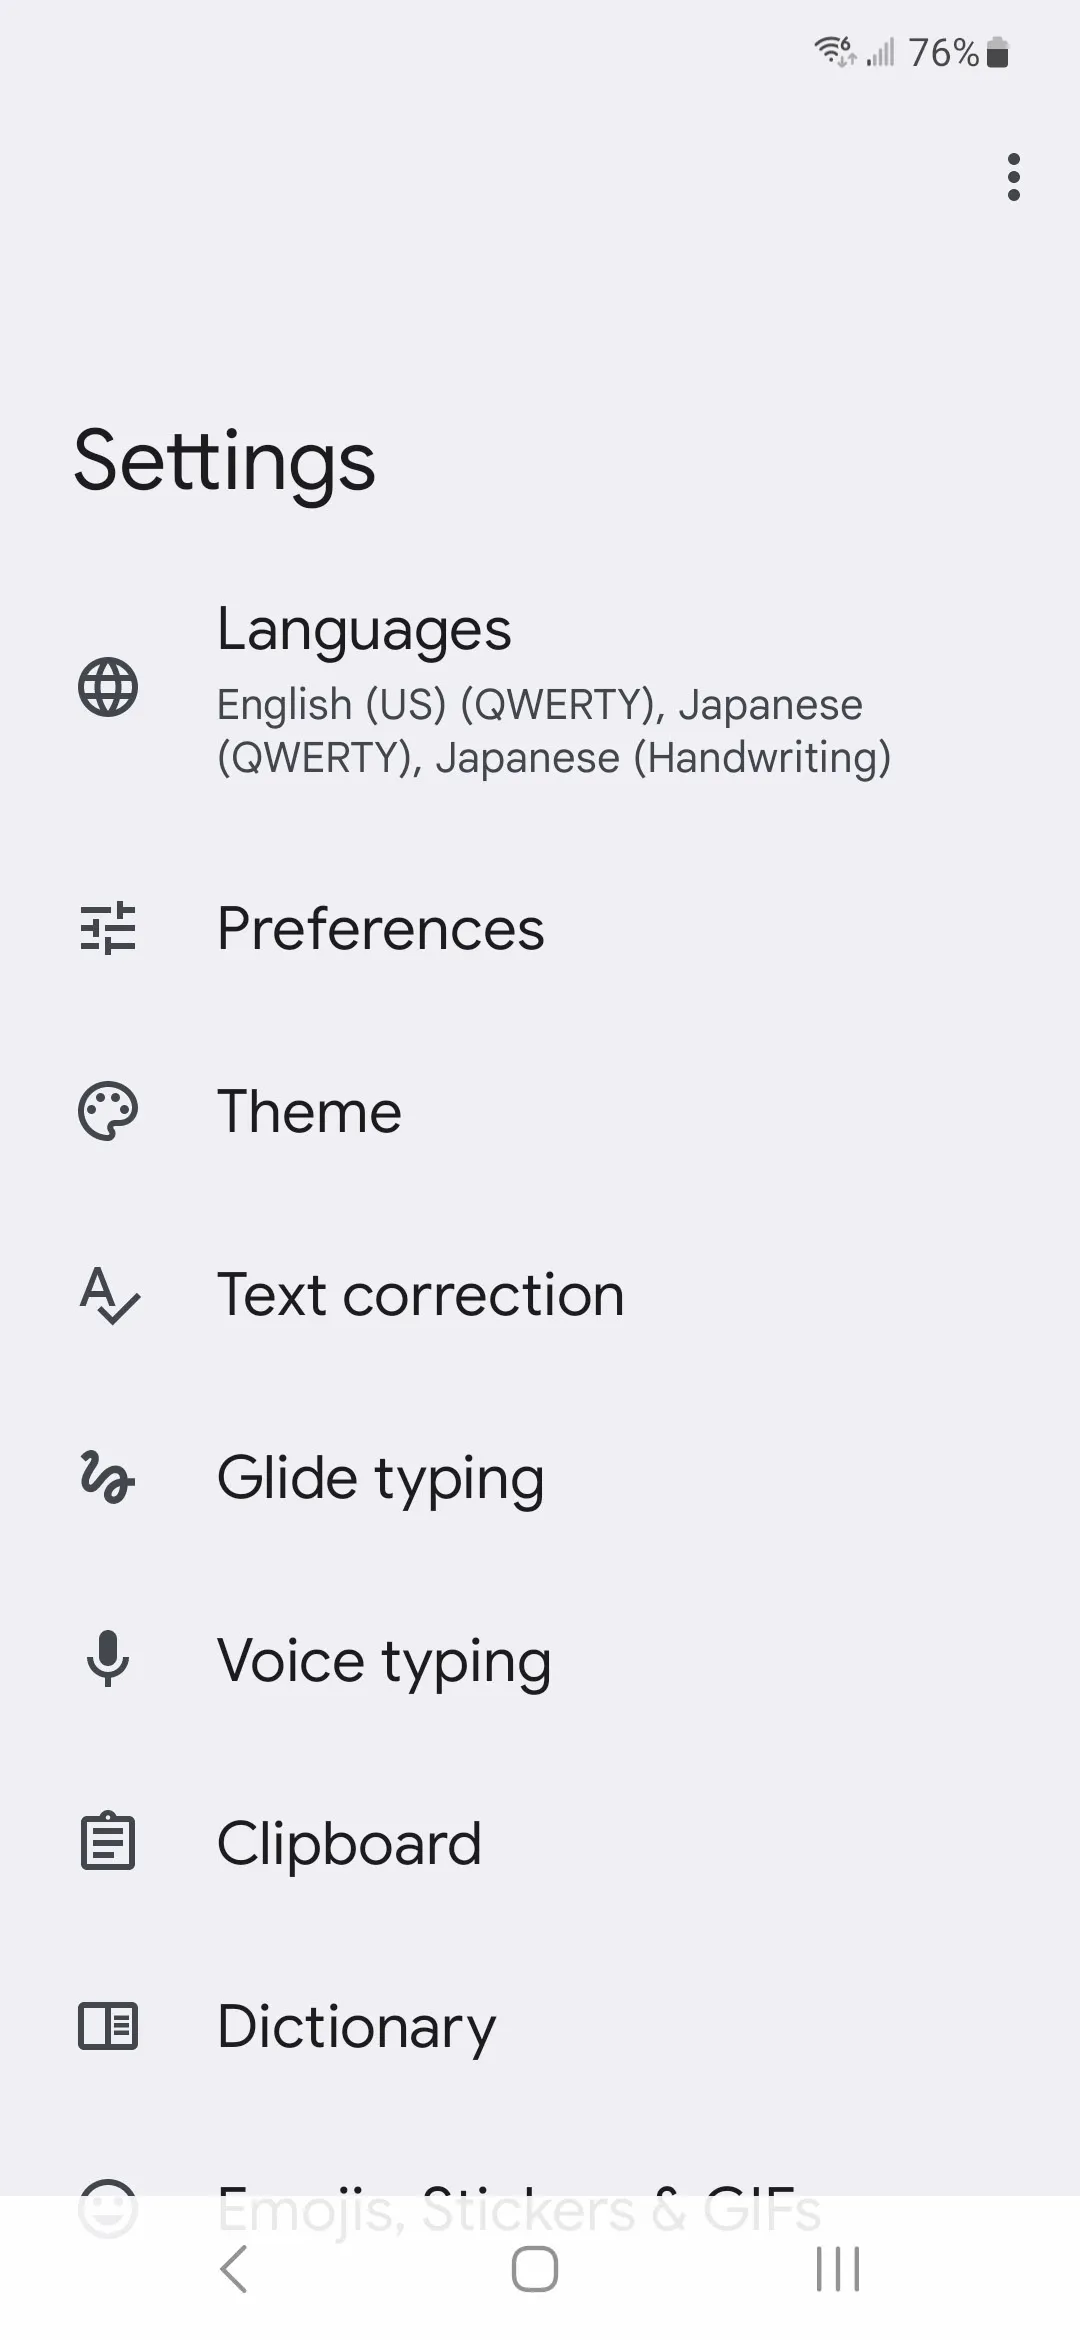
6. Search for Japanese.
7. Choose the Japanese input style you want.
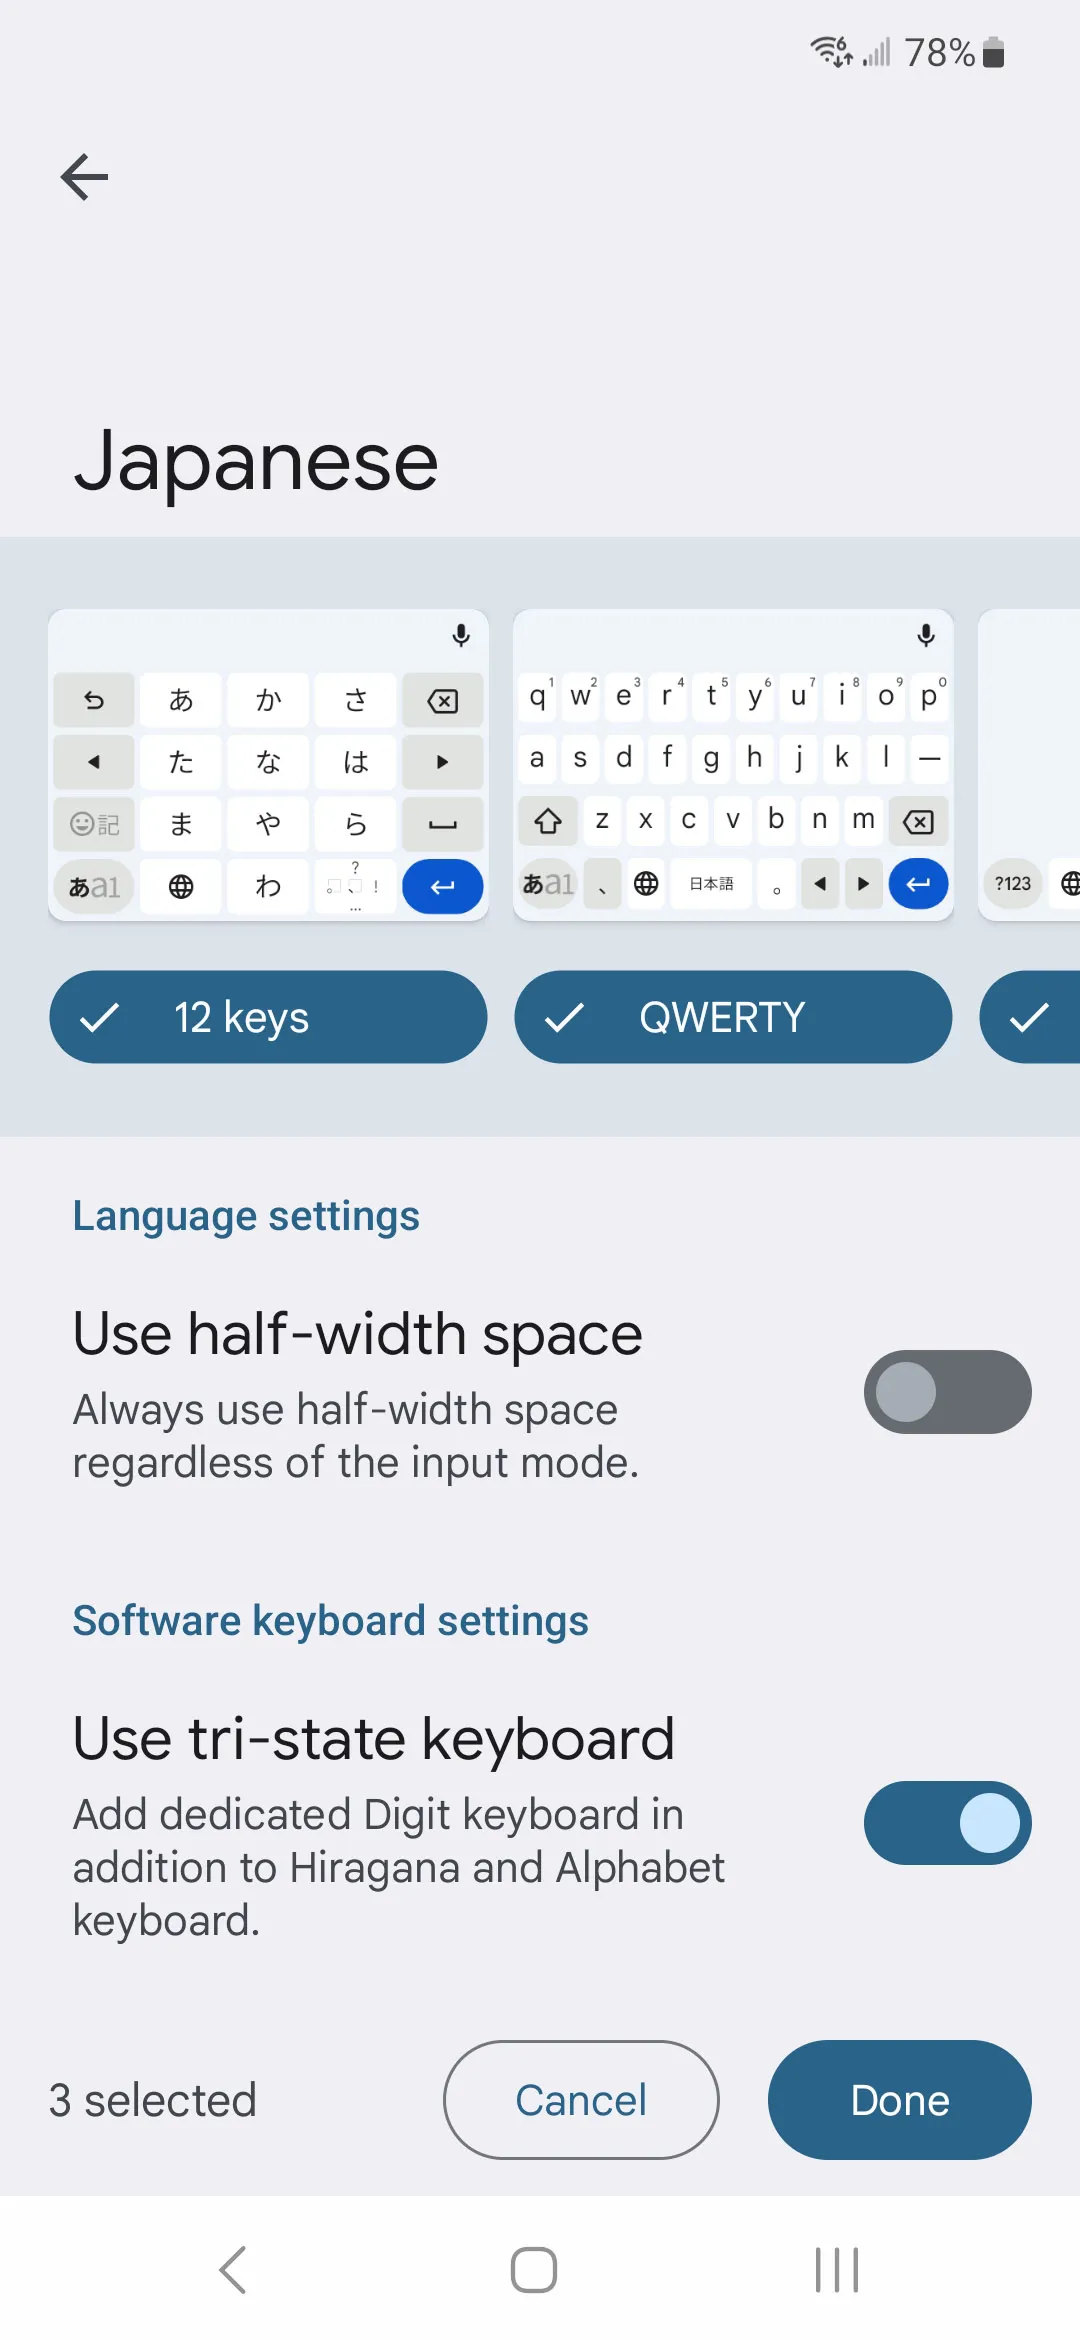
8. Tap Done.

After that, open any app where you can type. You can usually switch input languages by tapping the language key or holding the space bar. If Gboard gives you multiple Japanese layouts, start with the QWERTY / romaji-friendly one.
Do this next: type ten easy kana words, then jump into Learn Hiragana Online Free or Learn Katakana so the keyboard setup immediately turns into real practice.
How to install Japanese keyboard on Mac
On Mac, the path is clean once you know where Text Input lives.
Follow these steps:
1. Click the Apple menu – Go to Setting
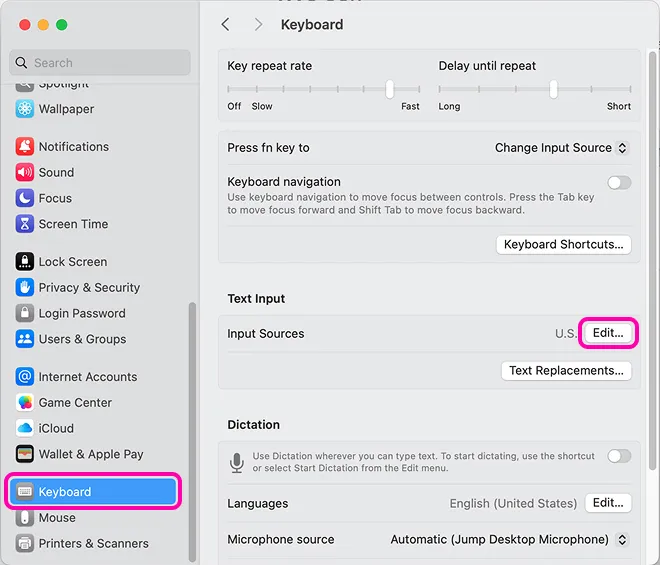
2. Click add Button input sources.
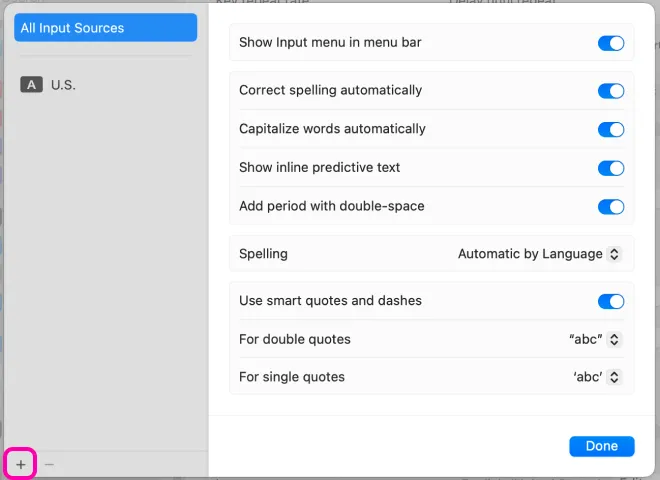
3. Add Japanese language.
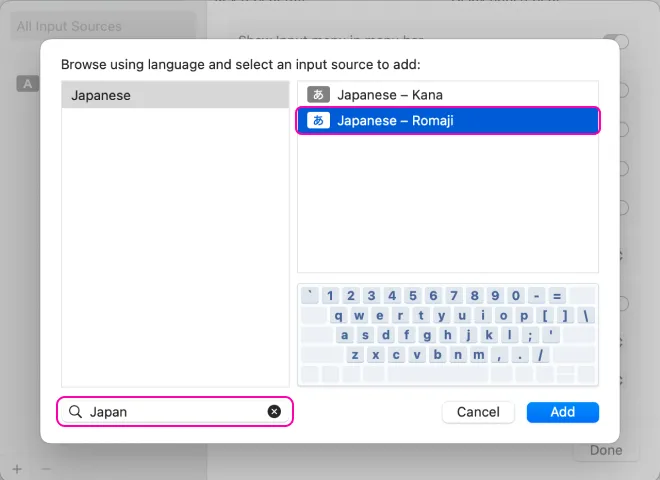
4. Choose Japanese – Romaji keyboard.

Once Japanese is active, you can switch input sources from the menu bar or with your keyboard shortcut. On many Macs, the default shortcut for next input source is Control + Space.
If you later want to experiment with Japanese – Kana, you can add it too. Just do not start there unless you genuinely want extra friction.
Read: Hiragana learning. With pronunciation and kana, it is worth putting in the careful work early. When Japanese gets harder later, you will be glad this part is already stable.
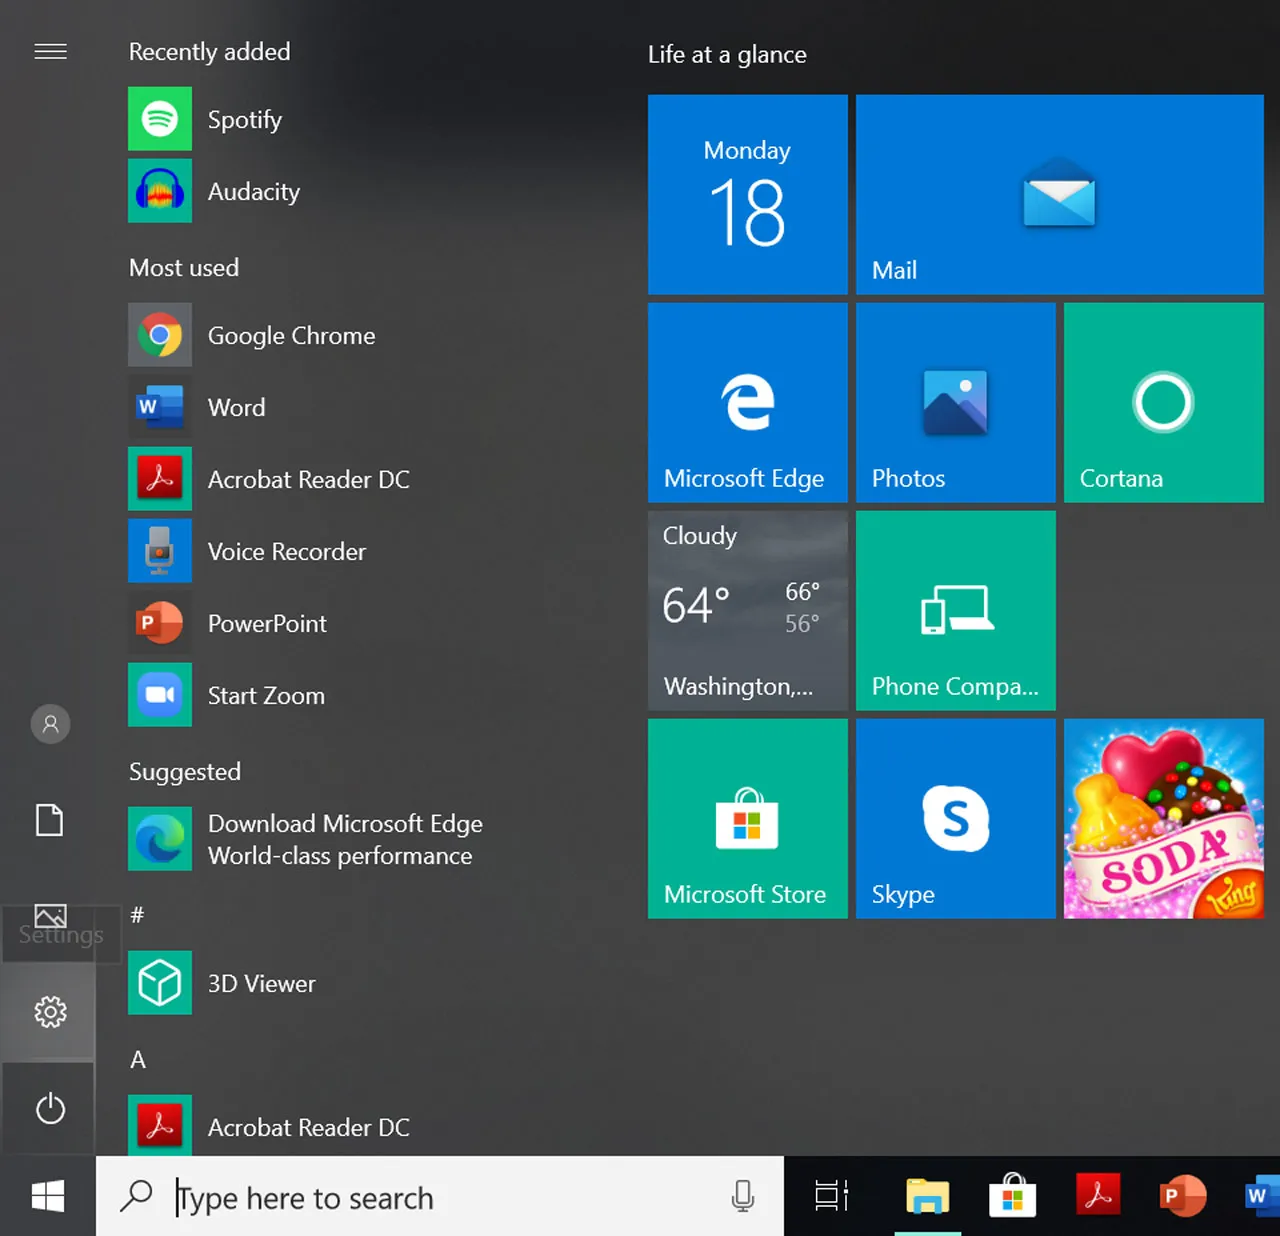
How to install Japanese keyboard on Windows
On Windows, you are really adding Japanese as a language input and then using the Microsoft Japanese IME.
Follow these steps:
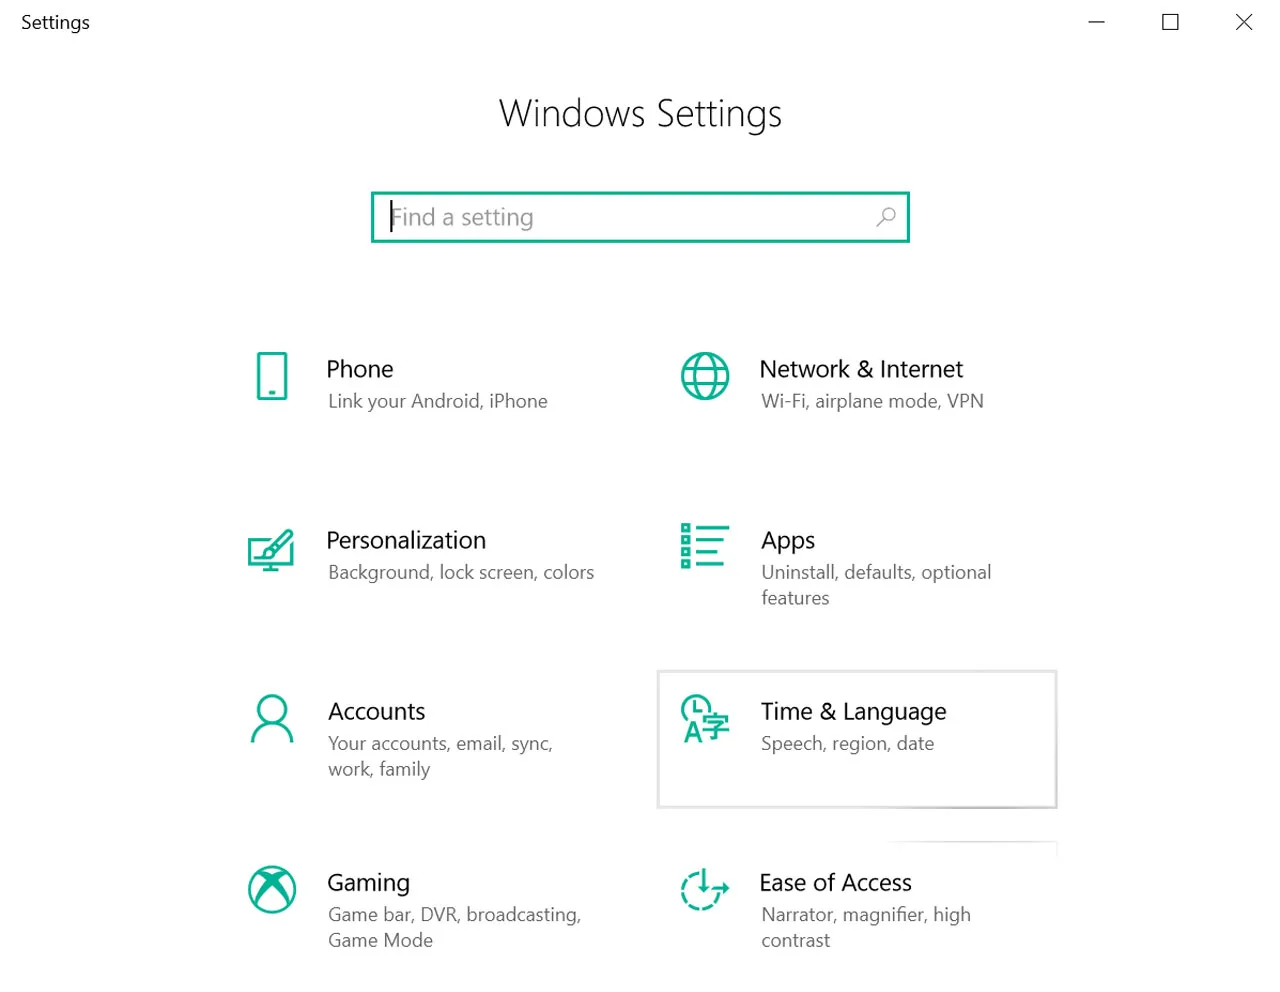
1. Open Settings.
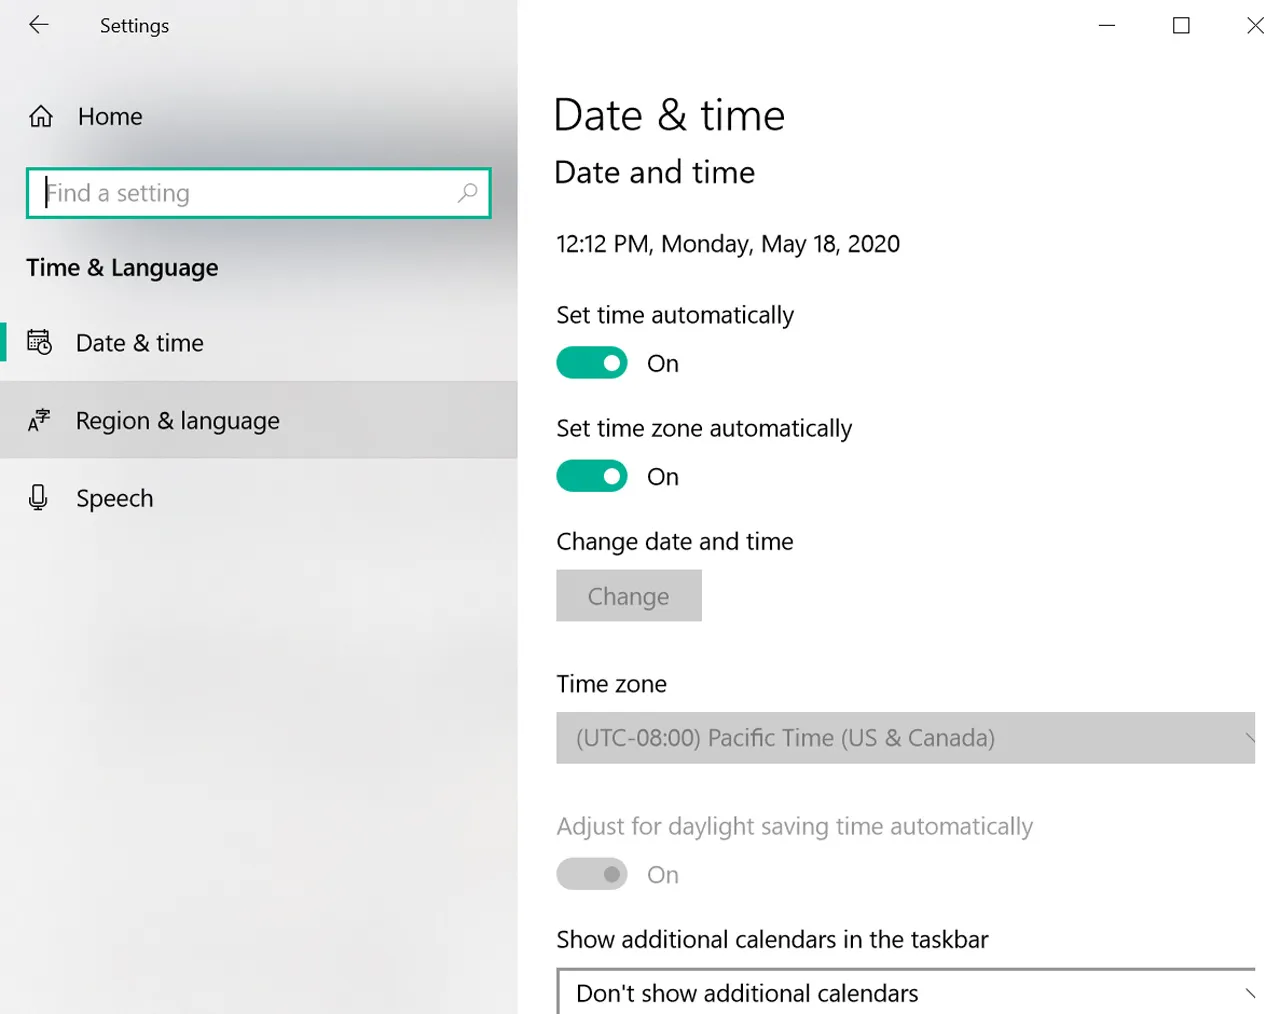
2. Go to Time & language.
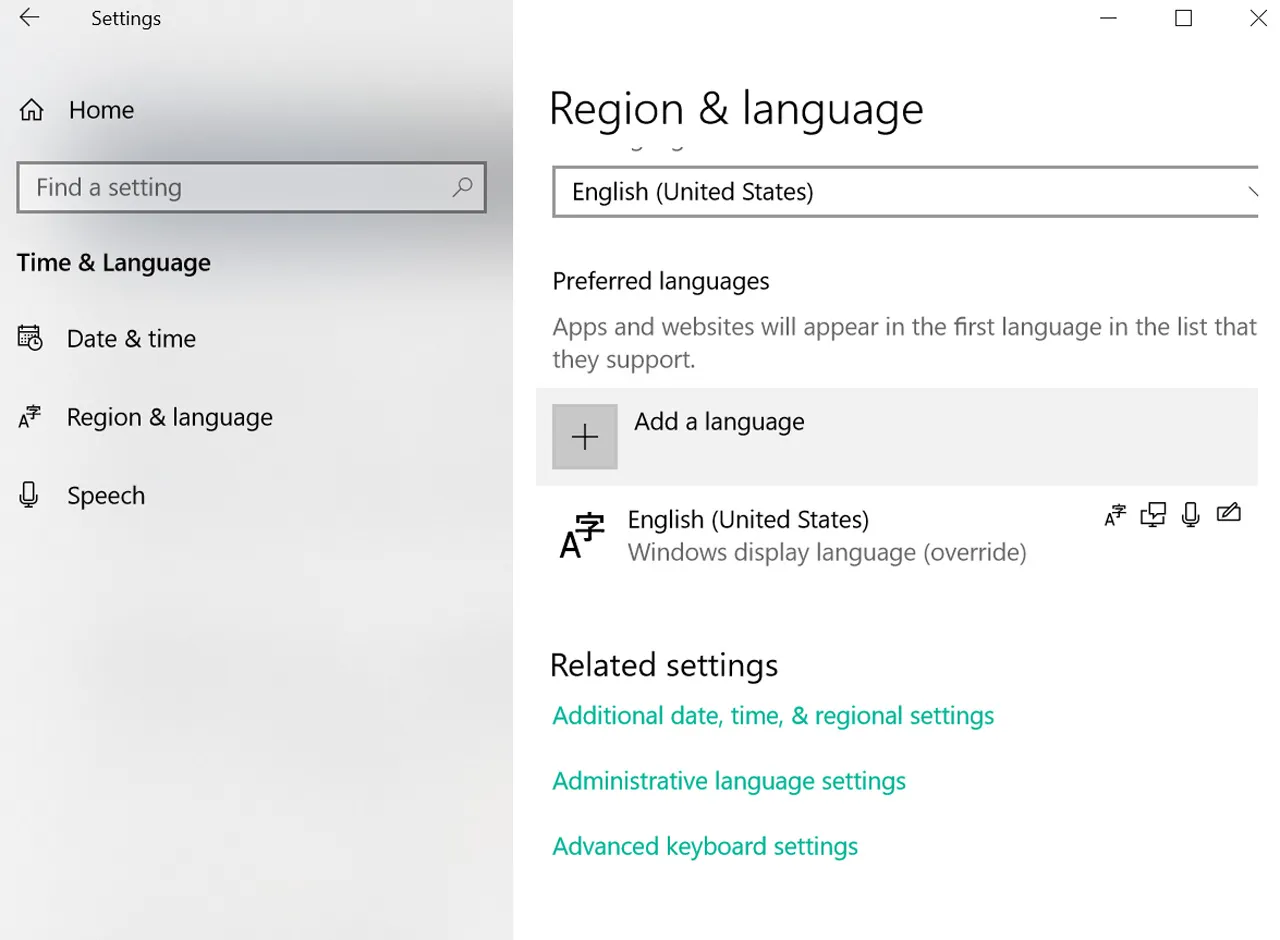
3. Open Language & region.
4. Click Add a language.
5. Search for Japanese.
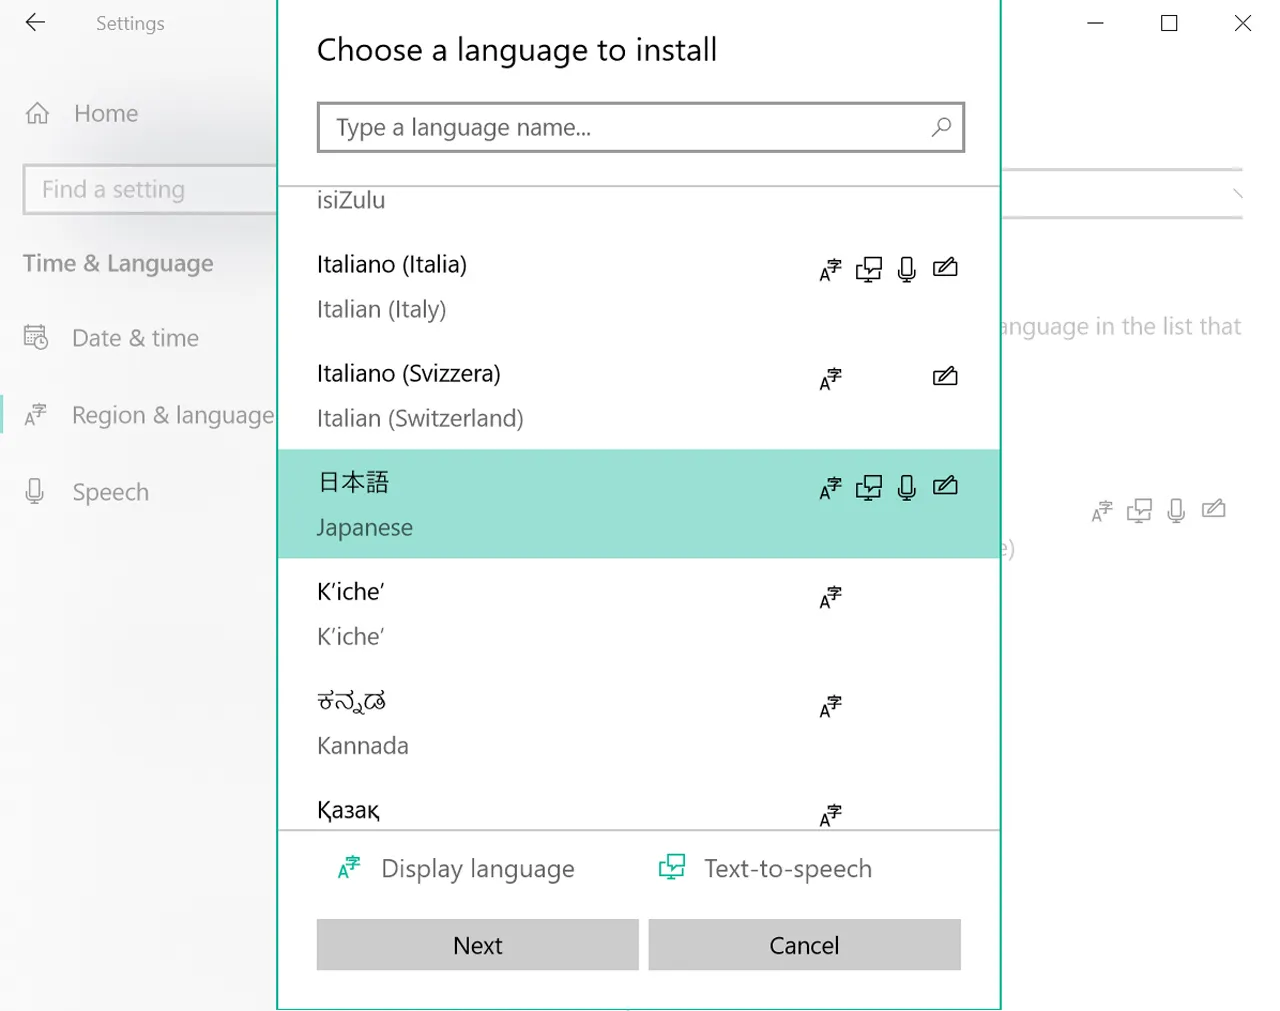
6. Select Japanese and install.
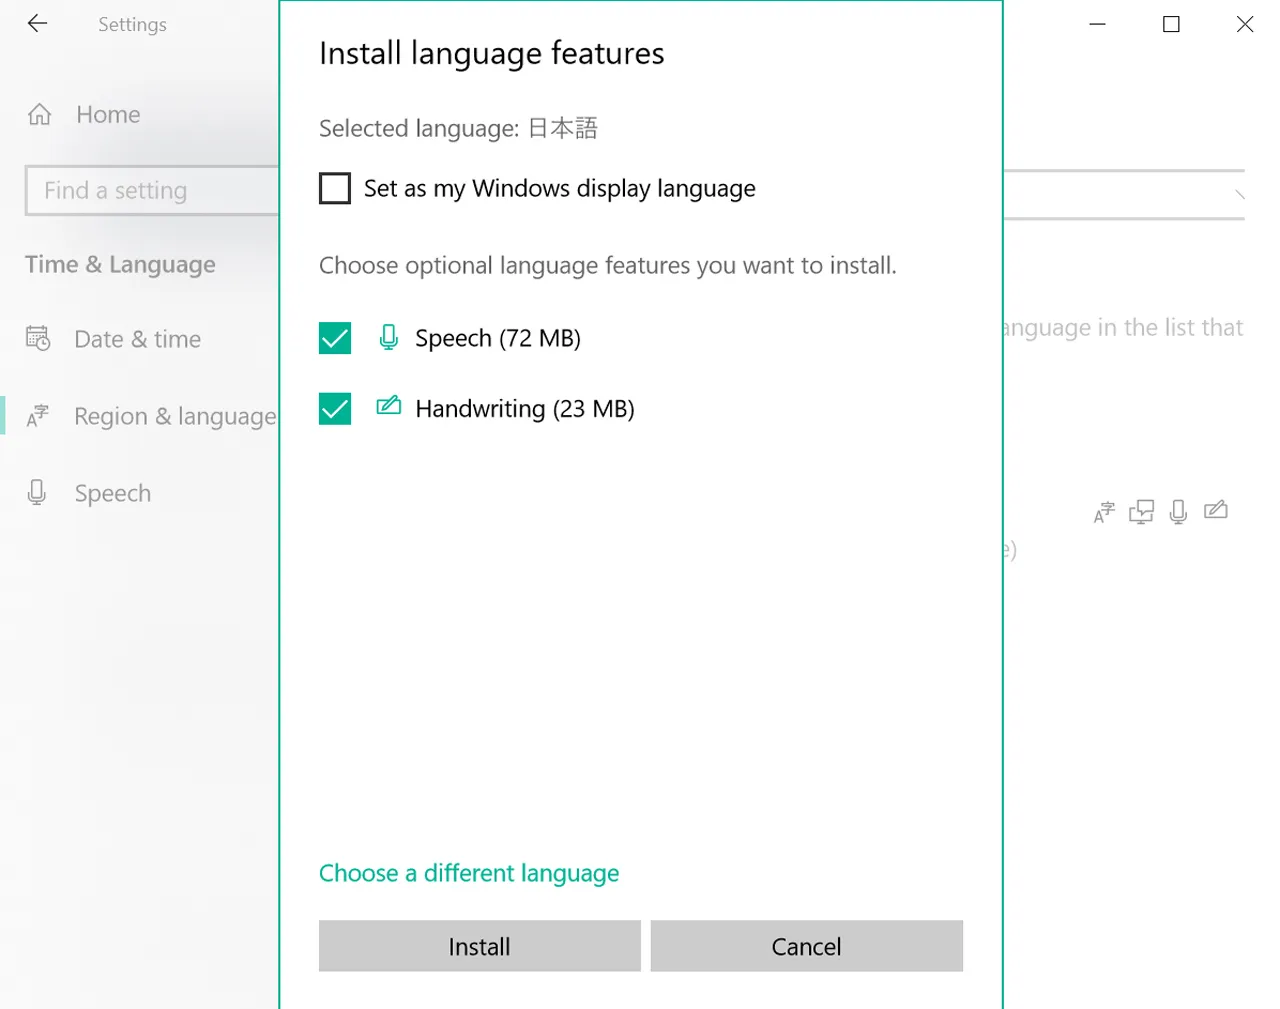
7. Switch to Japanese from the taskbar or with Windows key + Space.

After installation, make sure the active input method is actually the Microsoft Japanese IME. If Japanese appears in your language list but you still cannot convert romaji into kana or kanji, the IME may not be the active input method yet.
Windows is also nice because the Japanese IME gives you useful extras like candidate conversion and more explicit input mode switching than some phone keyboards.
Read next: Learn Kanji the Smart Way and Learn Kanji & Japanese Vocabulary. Once your keyboard works, it becomes much easier to look up and reuse the words you are learning.
How to switch between English and Japanese
Installing the keyboard is only half the story. The other half is being able to switch quickly without feeling like you are operating industrial equipment.
| Device | How to switch | What to watch for |
| iPhone / iPad | Tap the globe icon | If you installed both Kana and Romaji, you may need to cycle through more than once |
| Android / Gboard | Tap language key or hold space bar | Some phones hide the switcher until multiple languages are active |
| Mac | Use menu bar or input-source shortcut | Japanese – Romaji is usually the cleanest beginner choice |
| Windows | Use taskbar selector or Windows + Space | Make sure the Microsoft Japanese IME is active |
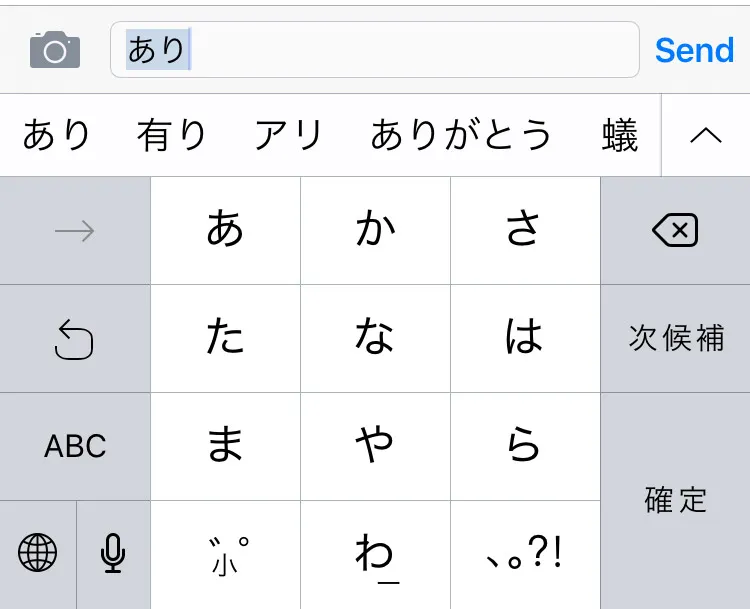
How Japanese typing actually works after installation
This is the part many guides skip too quickly: once the keyboard is installed, you are usually not typing kana directly from memory unless you chose a kana layout. Most beginners type in romaji first.
So if you type “nihongo,” the IME first gives you にほんご. Then, if you want kanji, you confirm or convert to 日本語.
That is why a Japanese keyboard becomes so useful so quickly. It is not just for typing messages. It also becomes a reading tool, a lookup tool, and a bridge into kana and kanji study.
| What you type | First output | Possible conversion | Example result |
| romaji | hiragana | kanji | gakkou -> がっこう -> 学校 |
| romaji | hiragana | katakana | koohii -> こーひー -> コーヒー |
| romaji | hiragana | kanji candidates | nihongo -> にほんご -> 日本語 |
Remember:
Installing the keyboard is not the finish line. It is the point where typing, reading, conversion, and lookup finally start working together.
Common problems after installation
A working installation can still feel broken if one small setting is off. Here are the problems beginners hit most often:
| Problem | What is happening | Fix |
| It still types English letters | Japanese is installed but not active | Switch to the Japanese input source or IME first |
| No kanji candidates appear | You are not converting or are in the wrong mode | Use the Japanese input mode and candidate conversion |
| The layout feels strange | You selected Kana instead of Romaji | Switch to Japanese Romaji or QWERTY if available |
| Windows has Japanese but nothing converts | The Microsoft Japanese IME is not active | Pick the Japanese IME from the taskbar language menu |
| Switching feels annoying | You do not know the shortcut yet | Learn the switch gesture now instead of later |
What to do right after installation
This is the part that decides whether the keyboard becomes a tool or just a completed checkbox.
1. Open a note app.
2. Type こんにちは.
3. Type にほんご.
4. Try converting がっこう into 学校.
5. Switch back and forth between English and Japanese a few times.
6. Type three or four words you already know.
Then go straight into Learn Hiragana lessons, Writing game, and MochiKana. If pronunciation still feels slippery, pair that with Japanese Writing System so the keyboard setup feeds directly into actual learning.
Okay, now go use it:
Install the keyboard. Type until switching feels normal. Get to the point where kana input does not feel like a guest feature on your own device. Then move on.
How this fits into the bigger beginner roadmap
Installing a Japanese keyboard is one of those early tasks that feels technical but quietly improves everything else. Once it works, you can search faster, type notes, look up unfamiliar words, practice kana actively, and start interacting with Japanese instead of only reading about it.
From here, the clean next path is MochiKana -> Learn Hiragana Online Free -> Learn Katakana Online Free -> Learn Kanji & Japanese Vocabulary -> Kanji123 – Free JLPT Kanji Test Online.
Final thoughts
Installing a Japanese keyboard is one of the highest-payoff beginner setup tasks because it turns your phone or computer into an actual Japanese study tool.
The process itself is not hard once you know where the settings live. Add Japanese, choose the right input mode, switch to it, test it immediately, and start using it in real study.
So yes, install the Japanese keyboard. But do not stop there. Use it with MochiKana, keep building with MochiKanji, and check your progress with Kanji123. Setup is nice. Momentum is better.
Now go make your keyboard useful.
FAQ
Do I need a Japanese keyboard to type Japanese?
No special hardware is required. Most beginners use a regular keyboard with a Japanese IME or Japanese input source.
What is the easiest Japanese keyboard layout for beginners?
Romaji input is usually the easiest because you type with familiar Latin letters and let the IME convert the result into Japanese.
How do I switch between English and Japanese keyboards?
For iPhone users, simply tap the globe icon. If you’re on Android, use the language key or long-press the space bar. Desktop users on Mac and Windows can switch input sources via the menu bar, taskbar, or shortcuts.
Why does my Japanese keyboard still type English letters?
The Japanese keyboard may be installed but not active, or the current input mode may still be English.
Should I learn kana before installing a Japanese keyboard?
No. Install it early. It becomes much more useful once you start learning kana, and there is no reason to postpone the setup.


Pingback: How to Type in Japanese: Kana, Kanji and More - Kanji123